Affordable gaming set up for Beginners
Affiliate Disclosure
This post contains affiliate links. Pixels and Bloom may earn a commission when you purchase through these links, at no additional cost to you. All opinions are our own and we only recommend products we believe will genuinely benefit our readers.
Everyone starts somewhere. Maybe you’ve been borrowing a friend’s setup. Maybe you’ve been playing on a laptop that’s seen better days. Maybe you just got into gaming and you’re staring at online shopping carts wondering what you actually need versus what’s just marketing hype dressed up in RGB lighting.
Here’s the truth about building an affordable gaming setup in 2026: you don’t need to spend a fortune to have a genuinely great experience. The gap between budget gear and premium gear has never been smaller. A well-optimized budget gaming setup in 2026 can outperform a poorly optimized expensive one. GhettoSmurf Gaming The difference is knowing where to spend and where to save — and that’s exactly what this guide covers.
We’ll walk through every component of a complete gaming setup from the ground up:
- The PC — what actually matters for performance
- The monitor — the screen you’ll stare at for thousands of hours
- The mouse and keyboard — your primary control interface
- The headset — audio quality changes everything
- The desk — where it all lives
- The chair — more important than most beginners realize
- The peripherals — lighting, cable management, and the finishing touches
- Minecraft-specific recommendations — what this audience specifically needs
We’ll also cover three budget tiers so you can find the right entry point regardless of what you’re working with:
- 🟢 Starter Tier (~$300–$600) — The essentials, nothing more
- 🟡 Solid Tier (~$600–$1,000) — A complete, capable setup
- 🔵 Upgrade Tier (~$1,000–$1,500) — Everything a serious beginner needs
And throughout the guide, we’ll reference products from Razer — whose gaming peripheral lineup covers every budget tier with genuine quality — and Flexispot — whose ergonomic desk solutions give your setup the professional foundation it deserves.
Let’s build your setup.
The Setup Mindset: Spend Smart, Not Flashy
Before we get into components, one principle that will save you hundreds of dollars:
Where most beginners go wrong when building a budget gaming setup: overspending on RGB everything, “gaming” branded accessories with no performance gain, ultra-high-end monitors they don’t need, and expensive chairs without real ergonomic support. Spend smart, not flashy. GhettoSmurf Gaming
The components that most directly affect your gaming experience, in order of impact:
- GPU (graphics card) — determines what games you can run and at what quality
- CPU (processor) — determines how fast your system processes game logic
- Monitor refresh rate — determines how smooth gameplay feels
- RAM — determines multitasking smoothness and stability
- Mouse sensor quality — determines accuracy in every game
- Audio quality — wildly underrated; changes the entire experience
- Everything else — RGB lighting, case aesthetics, desk accessories
Spend on the top of that list. Save on the bottom. Every dollar you spend on RGB lighting instead of a better GPU is a dollar that reduces your actual gaming performance.
With that framework in mind — here’s how to build every tier of the setup.
Component 1: The PC — Your Most Important Investment
Your PC is where most of your budget should go. You don’t need a high-end build to enjoy modern games — a mid-range GPU, 16GB RAM minimum, SSD storage (non-negotiable), and a decent CPU at the Ryzen 5 or i5 level can comfortably run most games at 1080p high settings. GhettoSmurf Gaming
Should You Build or Buy Pre-Built?
For beginners in 2026, the honest answer is: either works, but building saves money if you’re willing to learn.
Building your own PC gives you complete control over component selection, typically saves 15–25% compared to pre-built equivalents, and teaches you how your system works (invaluable for future upgrades). The process is more beginner-accessible than ever — modern cases, modular PSUs, and well-designed components have made cable management and installation more beginner-friendly than it’s ever been. Xidax
Pre-built PCs save time, come with warranty support for the entire system, and eliminate the compatibility research burden. The trade-off is paying a premium for that convenience.
Budget Tier PC Options
🟢 Starter Tier (~$500–$700)
A sub-$700 gaming PC in early 2026 will deliver playable frame rates in most games at 1080p. This system easily runs lightweight and esports games like Counter-Strike 2, Dota 2, and Marvel Rivals, and handles popular titles like Dead by Daylight at medium settings. GamersNexus
For this budget, target:
- CPU: AMD Ryzen 5 5500 or Intel Core i5-12400F
- GPU: Intel Arc B570 (~$200) or AMD RX 6600
- RAM: 16GB DDR4
- Storage: 500GB–1TB NVMe SSD
- Key note: RAM and SSD prices have been at their highest levels in several years — budget accordingly and prioritize these components over case aesthetics. GamersNexus
🟡 Solid Tier (~$800–$1,000)
For around $800, you can build a computer that serves as an excellent 1080p gaming PC and even a good option for 1440p gaming. An AMD Ryzen 5 5600 CPU paired with an RTX 5060 GPU and 16GB of DDR4 RAM is capable of playing most games at 1440p at medium-to-higher settings with excellent frame rates. Tech Guided
🔵 Upgrade Tier (~$1,000–$1,500)
At this budget you’re looking at a system that handles any game at 1080p on maximum settings and most games at 1440p comfortably — a setup that will serve you well for 3–4 years before meaningful upgrades are needed.
The Alternative: Gaming Laptop
If portability matters — you game at different locations, share a room, or don’t want a dedicated desk space — a budget gaming laptop is a legitimate option. 1080p at 144Hz is still one of the best budget gaming experiences available, GhettoSmurf Gaming and several gaming laptops deliver this at $600–$900.
The trade-offs: laptops generate more heat, can’t be upgraded as easily, and the screen is typically lower quality than a dedicated monitor. But for beginners who value flexibility over raw performance, a gaming laptop paired with a good mouse and headset is a completely viable starting point.
What About Minecraft Specifically?
Good news for Minecraft players: Minecraft is one of the least demanding popular games in terms of hardware requirements. A basic $400–$500 system runs Minecraft at high settings without breaking a sweat. Where hardware matters for Minecraft is running shader packs and large modpacks — for those, aim for the Solid Tier with 16GB RAM minimum and an RTX 3060 or equivalent GPU for full shader support.
🔗 Already have your PC sorted? Read our how to start a Minecraft server guide → to get your server running today
Component 2: The Monitor — Your Window Into the Game
A lot of beginners overspend on monitors. You don’t need 4K to enjoy gaming. A 1080p resolution, 144Hz refresh rate, and 1ms response time gives you smooth gameplay without breaking the bank. GhettoSmurf Gaming
The Numbers That Actually Matter
Resolution:
- 1080p (Full HD) — The sweet spot for budget gaming. Every budget GPU handles it well. Crystal clear on screens up to 27 inches.
- 1440p (QHD) — A meaningful upgrade in visual clarity. Requires a more powerful GPU. Suitable for Solid and Upgrade tier builds.
- 4K — Not recommended for budget builds. The GPU cost to run 4K at smooth frame rates far exceeds what beginners should spend.
Refresh Rate: This is the number that most dramatically changes how gaming feels.
- 60Hz — Standard. Fine for casual gaming and Minecraft.
- 144Hz — The budget gaming sweet spot. Everything feels dramatically smoother. Worth prioritizing over resolution upgrades.
- 165Hz–240Hz — Diminishing returns for most players; primarily for competitive FPS.
Response Time:
- 1ms — Standard for gaming monitors in 2026. Any monitor marketed as a gaming monitor should hit this.
- Higher response times cause ghosting — visual blurring behind fast-moving objects. Avoid anything above 4ms for gaming.
Panel Type:
- IPS — Best color accuracy and viewing angles. Recommended for most gamers.
- VA — Better contrast, especially for dark scenes. Good for single-player games.
- TN — Fastest response times historically, but poor colors. Less relevant in 2026 as IPS panels have caught up.
Budget Tier Monitor Recommendations
🟢 Starter Tier ($100–$150): A 24-inch 1080p 144Hz IPS monitor. Several models from AOC, LG, and Acer hit this price point with excellent gaming performance. This is genuinely all you need to start.
🟡 Solid Tier ($150–$250): A 27-inch 1440p 144Hz IPS monitor. The jump from 1080p to 1440p on a 27-inch screen is immediately noticeable — sharper text, more detailed game environments, cleaner overall appearance.
🔵 Upgrade Tier ($250–$400): A 27-inch 1440p 165Hz+ IPS or OLED monitor. OLED panels in particular are transforming the mid-range monitor market in 2026 — the contrast ratio difference is dramatic.
⚒️ Pro tip: Buy your monitor based on the GPU you have, not the GPU you aspire to. A 1440p monitor is wasted money if your GPU can’t run games at 1440p smoothly. Match your monitor tier to your PC tier.
Component 3: Mouse and Keyboard — Your Primary Controls
For your mouse, sensor quality matters more than price. For your keyboard, a mechanical or good membrane keyboard with optional RGB covers everything you need. GhettoSmurf Gaming
Gaming Mouse
The mouse is the peripheral where quality genuinely matters at lower price points. A poor sensor causes cursor drift and imprecise tracking — problems that affect every game you play. A quality sensor at any price tier solves this completely.
What to look for:
- Sensor: Look for optical sensors from PixArt (the industry standard sensor manufacturer). Avoid “gaming” mice with laser sensors or unspecified sensors.
- Weight: Lighter mice (under 80g) reduce hand fatigue during long sessions. Under 60g is considered ultralight.
- DPI range: 400–3200 DPI covers the vast majority of gaming use cases. Higher maximum DPI numbers are marketing; what matters is accuracy at your preferred sensitivity.
- Wired vs wireless: Wireless gaming mice in 2026 have eliminated latency concerns. Both are equally viable.
Budget Tier Recommendations: The Logitech G305 is the best budget gaming mouse you can buy in 2026 — a consistent recommendation from Tom’s Hardware and PC Gamer for years because it just doesn’t stop being good value. Benable LIGHTSPEED wireless at a budget price point.
For premium performance at every tier, Razer makes some of the most celebrated gaming mice available. The Razer Viper V3 Pro — with its 54g ultralight build, excellent precision, and fast sensor performance — is ideal for FPS games and gamers who prefer ultra-light mice. Etail For a versatile option that works across gaming and productivity, the Razer Basilisk V3 Pro delivers excellent all-around sensor performance with RGB customization.
Razer’s lineup covers every budget tier — from accessible entry-level options to professional-grade ultralight mice that competitive players trust. Whatever your budget, there’s a Razer mouse that delivers genuine gaming performance rather than just gaming aesthetics.
Gaming Keyboard
The keyboard decision for beginners comes down to one primary choice: mechanical vs membrane.
Mechanical keyboards:
- Each key has its own physical switch mechanism
- Tactile feedback (you feel when a key actuates)
- More satisfying to type and game on
- Longer lifespan — rated for 50–100 million keystrokes
- Entry-level mechanicals start around $40–$60
Membrane keyboards:
- Single rubber dome layer beneath all keys
- Softer, quieter keypress
- Cheaper to produce — good options under $30
- Shorter lifespan but adequate for casual gaming
Our recommendation: Start with a budget mechanical keyboard if you can afford it — the tactile feedback genuinely improves both gaming accuracy and typing comfort. Several keyboards have launched at $40–$80 in the past six months that deliver QMK/VIA + hot-swap + gasket mount combinations that previously cost $150+. Gaming PC
Hall Effect switches are the 2026 competitive standard for serious gamers — they use magnetic switches with adjustable actuation points that respond faster than traditional mechanical switches. If you’re playing competitive games like CS2 or Valorant, this technology makes a measurable difference. For Minecraft and casual gaming, standard mechanical switches are perfect.
For premium keyboard quality with full customization, Razer keyboards deliver across every price tier. Their Huntsman series mechanical keyboards use Razer’s proprietary optical switches — faster actuation than traditional mechanicals, with the satisfying tactile response that makes long gaming and typing sessions genuinely comfortable.
👉 Browse Razer gaming keyboards →
Budget Tier Keyboard + Mouse Recommendations
| Tier | Mouse | Keyboard | Combined Budget |
|---|---|---|---|
| 🟢 Starter | Logitech G305 | Budget mechanical ($40–$60) | $70–$100 |
| 🟡 Solid | Razer Basilisk V3 | Razer BlackWidow V3 | $100–$160 |
| 🔵 Upgrade | Razer Viper V3 Pro | Razer Huntsman V3 Pro | $200–$300 |
Component 4: Gaming Headset — The Most Underrated Component
Audio is massively underrated in gaming. Focus on sound quality and comfort, not branding. GhettoSmurf Gaming
This is the component most beginners under-invest in — and it’s one of the ones that most dramatically changes the gaming experience. Spatial audio tells you where enemies are in 3D space. A quality microphone makes communication with teammates clear. Comfortable padding makes four-hour sessions feel like one hour.
What to Look For in a Gaming Headset
Sound quality: Frequency response, driver size, and spatial audio processing determine how immersive and accurate the audio is. For gaming specifically, positional audio accuracy — knowing exactly which direction sounds come from — is more important than pure audio fidelity.
Microphone quality: A cardioid microphone (picks up only what’s directly in front of it) with noise cancellation is the standard for gaming headsets. Teammates and servers should hear you clearly, not your mechanical keyboard or background noise.
Comfort: You will wear this for hours at a stretch. Memory foam ear cushions, adjustable headbands, and lightweight construction are not luxuries — they’re comfort necessities for anyone gaming regularly.
Wired vs wireless: Wired headsets are more affordable and have zero battery anxiety. Wireless headsets provide freedom of movement at a higher price. For desk gaming, wired is perfectly fine. For couch gaming or streaming setups where you move around, wireless is worth the premium.
Budget Tier Recommendations
🟢 Starter Tier ($30–$60): HyperX Cloud Stinger 2 at $49 delivers better comfort, compatibility, and sound quality than its price suggests. It’s consistently recommended by Tom’s Hardware and Tom’s Guide as the entry-level headset that punches above its weight class.
🟡 Solid Tier ($60–$120): This is where Razer headsets become particularly compelling. The Razer Kraken series offers genuine gaming audio quality with Razer’s characteristic comfort-forward design and reliable directional audio performance. The Kraken’s large ear cushions are specifically designed for extended gaming sessions, and the cardioid microphone delivers clear voice communication.
🔵 Upgrade Tier ($120–$200): The Razer BlackShark V2 series represents the premium end of the gaming headset market — THX Spatial Audio, TriForce Titanium drivers, and HyperSpeed wireless technology. This is professional-grade gaming audio at a price that serious beginners can justify.
The consistent quality across Razer’s headset lineup — from the accessible Kraken to the professional BlackShark — means you can start at any budget tier and upgrade within the same ecosystem as your setup grows.
👉 Browse Razer gaming headsets →
Component 5: The Desk — The Foundation of Everything
Everything you’ve read about so far sits on your desk. It’s the physical foundation of your setup — and yet it’s the component most beginners give the least thought to.
A poor desk creates cascading problems: not enough surface space for your monitor and peripherals, wrong height causing shoulder and neck strain, poor cable management making the setup look and feel chaotic. A good desk eliminates all of these problems simultaneously.
What to Look For in a Gaming Desk
Size: Minimum 120cm (47 inches) wide for a single-monitor setup with comfortable elbow room. 140–160cm for a dual-monitor setup or if you want layout flexibility.
Height: Your desk height determines your posture. The ideal desk height puts your forearms roughly horizontal when your hands are on the keyboard — elbows at approximately 90 degrees. For most adults, this is 70–75cm. Adjustable height desks eliminate this calculation entirely.
Surface material: A smooth, consistent surface that a mouse can track on cleanly without a mat is ideal. Avoid deeply textured surfaces that create resistance. Most gaming desks use a matte or semi-matte finish that works well.
Cable management: Grommets (holes for routing cables), cable trays beneath the surface, and cable hooks along the frame transform a chaotic setup into a clean one. This isn’t aesthetic — organized cables are easier to troubleshoot and don’t create trip hazards.
Why a Standing Desk Changes Everything
The single best desk upgrade any gamer can make — especially beginners who are setting up their first serious gaming space — is investing in a height-adjustable standing desk.
Flexispot makes some of the best ergonomic standing desks available, and they’re the upgrade that fundamentally changes how your setup feels and how long you can comfortably use it.
Here’s why it matters beyond just gaming:
For gamers: Alternating between sitting and standing during long sessions dramatically reduces fatigue — the physical tiredness that makes late-session gameplay feel sluggish. Standing for 15–20 minutes every hour keeps blood circulating and maintains focus in a way that sitting continuously simply can’t match.
For content creators: If you’re streaming, recording YouTube videos, or blogging about Minecraft (as covered in our Minecraft income guide →), you’re spending even more time at your desk than a casual gamer. Flexispot’s standing desks are built for this sustained use — they’re the workspace investment that pays back in productive hours and physical wellbeing.
For everyone: Poor posture at a desk is one of the most common causes of back, neck, and shoulder pain. A properly adjusted standing desk at the right height eliminates the postural compromises that fixed-height desks force on anyone who isn’t exactly the “average” height the desk was designed for.
Flexispot’s lineup for beginners:
- E2 Electric Standing Desk — Entry-level electric height adjustment, smooth and quiet motor, programmable height memory. The most accessible starting point.
- E5 Pro Series — More powerful motor, wider height range, anti-collision technology. The Solid Tier desk recommendation.
- E7 Pro — Their flagship model with dual motors, maximum stability even at full standing height, and a premium build quality that lasts decades. The Upgrade Tier choice for anyone building a serious creator or gaming workstation.
All Flexispot desks include programmable height memory — set your preferred sitting and standing heights and switch between them with a single button press. The transition takes 20 seconds and becomes a completely natural part of your session routine within days.
👉 Browse Flexispot standing desks →
Budget Tier Desk Recommendations
| Tier | Option | What You Get |
|---|---|---|
| 🟢 Starter | Fixed-height desk ($80–$150) | Basic surface, adequate size, functional |
| 🟡 Solid | Flexispot E2 Electric ($250–$350) | Height adjustable, programmable memory, quality surface |
| 🔵 Upgrade | Flexispot E5/E7 Pro ($350–$500) | Dual motors, maximum stability, premium build |
Component 6: The Chair — More Important Than You Think
Your chair is the component you will feel most if you choose poorly. Lower back pain from a poorly supported chair doesn’t announce itself immediately — it builds over weeks and months of poor posture. By the time most people notice the problem, they’ve been sitting wrong for a long time.
Don’t just blindly go for something because it’s labeled a gaming chair. You’re looking for a chair that’s ergonomically designed for sitting at a desk for hours on end — which means you should probably be looking at task or office chairs, or at least task- or office-style gaming chairs. Tom’s Hardware
The Gaming Chair Problem
The racing-seat style gaming chairs that dominate the market — high bolstered backs, faux leather, aggressive color schemes — are designed to look like racing car seats, not to support a human body sitting at a desk for four hours. Many have fixed lumbar positions that don’t match the natural curvature of most people’s spines.
This doesn’t mean all gaming chairs are bad — it means you should evaluate a chair on ergonomic features, not aesthetics.
What to Actually Look For
Adjustable lumbar support: The lower back support should be independently adjustable in both height and depth to fit your specific spine. Fixed lumbar support is a significant ergonomic compromise.
Seat depth adjustment: Being able to slide the seat forward or back relative to the backrest means the chair fits your leg length rather than forcing your leg length to fit the chair.
4D armrests: Adjustable in height, depth, width, and angle. Your forearms should rest naturally on the armrests without raising your shoulders.
Recline with tilt lock: Being able to lock the chair at a slight recline (100–110 degrees) reduces spinal compression compared to sitting perfectly upright.
Breathable material: Faux leather looks great for about a year before it starts cracking and peeling. Mesh or fabric chairs breathe better and last longer.
Budget Tier Chair Recommendations
🟢 Starter Tier ($100–$180): A basic ergonomic office chair with lumbar support and height adjustment. Don’t pay the “gaming” premium for a chair that offers the same ergonomics as an office chair at double the price.
🟡 Solid Tier ($180–$300): Razer’s Iskur gaming chair series offers a budget-friendly entry into proper gaming ergonomics with built-in (non-adjustable) lumbar support, 2D armrests, and a full 152-degree recline under $300. Tom’s Hardware The Iskur represents the intersection of Razer’s gaming aesthetic with genuine ergonomic consideration — a chair that looks at home in a gaming setup while supporting your body properly.
🔵 Upgrade Tier ($300–$600): At this tier, consider chairs from Secretlab, Herman Miller x Logitech G, or premium ergonomic office chairs from established manufacturers. These are chairs designed for all-day use with the adjustability to fit any body properly.
👉 Browse Razer gaming chairs →
Component 7: Internet Connection — The Invisible Component
You can have the most powerful gaming PC and the smoothest monitor in the world, and a poor internet connection will make online games feel terrible. For Minecraft multiplayer specifically — whether playing on someone else’s server or running your own — connection quality matters enormously.
What You Actually Need
Download speed: 25 Mbps minimum for smooth online gaming. 50–100 Mbps is comfortable. Higher speeds matter more for downloads than gameplay.
Upload speed: This is the one most people ignore — and it matters specifically for Minecraft server owners. If you’re running your own server, your upload speed determines how many players can connect smoothly. Minimum 10 Mbps upload; 20+ Mbps is better.
Ping (latency): This is more important than speed for gaming. Ping measures the round-trip time between your device and the server — lower is better. Under 50ms is excellent; 50–100ms is acceptable; above 100ms causes noticeable lag.
Wired vs wireless: For gaming, always use a wired ethernet connection if possible. WiFi introduces variable latency — your ping might be 20ms most of the time and spike to 150ms during a critical moment. Ethernet eliminates this variance entirely.
For Minecraft Server Owners
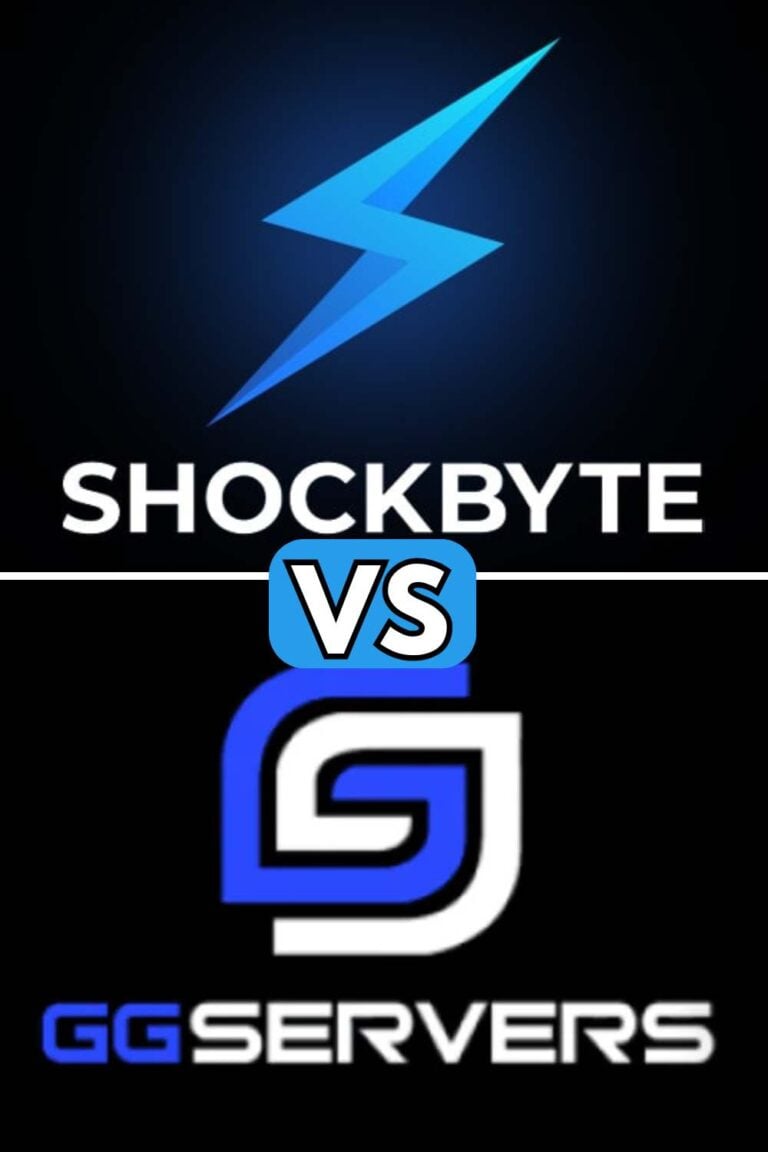
If you’re planning to run your own Minecraft server (covered in our Minecraft income guide →), your home internet isn’t the right hosting solution regardless of your connection quality. Professional server hosting through Shockbyte or GG Servers provides enterprise-grade infrastructure that your home connection simply can’t replicate — consistent uptime, DDoS protection, and server-grade hardware for $1.99–$3.00/month.
Component 8: Peripherals and Setup Finishing Touches
These components don’t affect performance directly — but they affect how your setup feels to use every day, and they’re where beginners can add significant value without significant cost.
Desk Mat / Mouse Pad
A large desk mat (80×40cm or larger) serves two purposes: it gives your mouse a consistent, optimized tracking surface across your entire desk, and it unifies the visual aesthetic of your setup. Even budget desk mats dramatically improve how a setup looks and feels. Budget: $15–$40.
LED Ambient Lighting
Bias lighting — LED strips placed behind your monitor or along the back of your desk — reduces eye strain during dark room gaming sessions and creates the distinctive “gaming setup” aesthetic that’s become associated with serious gaming spaces. Govee and Elgato make excellent, app-controlled LED strips at $20–$50 that sync with on-screen content or game audio.
Webcam (for streamers and content creators)
If you’re planning to stream your Minecraft sessions or create YouTube content — natural progressions once you’re comfortable with your setup — a quality webcam makes a real difference in production value. Logitech’s C920 series remains the budget standard; Razer’s Kiyo Pro is a step up with superior low-light performance.
USB Hub / Dock
Modern gaming setups involve more USB devices than most motherboards have ports for — gaming mouse, keyboard, headset, webcam, external drives. A powered USB hub ($20–$40) solves this cleanly and consolidates cable management.
Cable Management
This costs almost nothing and transforms your setup’s appearance and functionality. Basic cable management tools:
- Velcro cable ties: $8 for 100
- Cable raceway (adhesive channel that runs along desk edges): $15–$25
- Under-desk cable tray: $20–$35
- Cable clips: $10 for a set
Spending $50 on cable management makes a $500 setup look like a $1,500 one.
Complete Budget Tier Breakdowns
Here’s everything summarized by tier with realistic total costs:
🟢 Starter Tier (~$500–$800 total)
For: Complete beginners who want a functional gaming setup without overspending
| Component | Recommendation | Budget |
|---|---|---|
| PC | Budget prebuilt or DIY ($500–$700 range) | $500–$700 |
| Monitor | 24″ 1080p 144Hz IPS | $120–$150 |
| Mouse | Logitech G305 wireless | $35–$45 |
| Keyboard | Budget mechanical (Redragon K552 or similar) | $40–$55 |
| Headset | HyperX Cloud Stinger 2 | $45–$55 |
| Desk | Fixed-height desk (120cm+) | $80–$120 |
| Chair | Basic ergonomic office chair | $100–$150 |
| Desk mat | Large desk mat | $15–$25 |
| TOTAL | ~$935–$1,300 |
Reality check: Even the “starter” tier totals nearly $1,000 when you include every component. This is the honest reality of building a complete gaming setup in 2026. The good news: you don’t need everything at once. Start with PC + monitor + mouse + keyboard + headset, and add desk/chair upgrades over time.
🟡 Solid Tier (~$1,000–$1,500 total)
For: Beginners who want a setup they won’t outgrow in 2 years
| Component | Recommendation | Budget |
|---|---|---|
| PC | Solid mid-range build or prebuilt | $800–$1,000 |
| Monitor | 27″ 1440p 144Hz IPS | $180–$250 |
| Mouse | Razer Basilisk V3 | $60–$80 |
| Keyboard | Razer BlackWidow V3 TKL | $80–$100 |
| Headset | Razer Kraken | $50–$80 |
| Desk | Flexispot E2 Electric Standing Desk | $280–$350 |
| Chair | Razer Iskur / Mid-range ergonomic | $200–$280 |
| Desk mat + peripherals | LED strip, desk mat, USB hub | $60–$100 |
| TOTAL | ~$1,710–$2,240 |
🔵 Upgrade Tier (~$2,000–$3,000 total)
For: Serious beginners who want a professional-quality creator and gaming workstation
| Component | Recommendation | Budget |
|---|---|---|
| PC | High-end mid-range build | $1,200–$1,500 |
| Monitor | 27″ 1440p 165Hz+ IPS or OLED | $280–$400 |
| Mouse | Razer Viper V3 Pro ultralight | $140–$160 |
| Keyboard | Razer Huntsman V3 Pro | $180–$200 |
| Headset | Razer BlackShark V2 Pro | $150–$180 |
| Desk | Flexispot E5/E7 Pro Standing Desk | $380–$500 |
| Chair | Premium ergonomic (Secretlab, etc.) | $350–$500 |
| Peripherals | Webcam, LED, hub, cable management | $100–$150 |
| TOTAL | ~$2,780–$3,590 |
What to Prioritize If You’re Building Gradually
If you can’t buy everything at once (and most people can’t), here’s the order that maximizes your gaming experience at each stage:
Stage 1 — The Functional Setup: PC + Monitor + Mouse + Keyboard. This is a complete, playable setup. Everything else is enhancement.
Stage 2 — The Comfortable Setup: Add headset + desk mat. Audio transforms the experience. A desk mat makes the peripherals feel more cohesive.
Stage 3 — The Sustainable Setup: Upgrade your chair and desk. This is the stage most people delay and shouldn’t. The physical comfort of your workspace directly affects how long and how well you use your setup.
Stage 4 — The Complete Setup: Add LED lighting, proper cable management, webcam if streaming, and any peripheral upgrades (moving from starter mouse to Razer Viper, starter keyboard to Razer Huntsman).
Minecraft-Specific Setup Recommendations
Since most readers here are primarily Minecraft players, a few Minecraft-specific notes:
Minecraft runs on almost anything. Base Minecraft Java Edition runs smoothly on systems that struggle with modern AAA titles. Your hardware budget can lean lower if Minecraft is your primary game.
Shaders require a real GPU. Running OptiFine or Iris shaders with high-quality shader packs (BSL, Complementary) requires at minimum an RX 6600 or RTX 3060. Plan for this if shader gameplay is your goal.
Servers require upload bandwidth. If you’re running a server (see our Minecraft income guide →), either invest in good upload speed or use professional hosting through Shockbyte or GG Servers — which provides infinitely better server performance than any home connection for $1.99–$3.00/month.
For Minecraft content creation: Minecraft YouTubers and streamers benefit enormously from the Razer peripheral ecosystem — the headset microphone for clear commentary, the keyboard’s satisfying mechanical feedback on stream, and the precise mouse for clean gameplay footage. Flexispot standing desks are especially valuable for creators who spend 6–8 hours at their setup between gaming, recording, and editing.
16GB RAM minimum. Minecraft with mods, shaders, and a browser open simultaneously needs 16GB RAM. Don’t go below this for a gaming PC in 2026.
Common Beginner Mistakes to Avoid
Mistake 1: Overspending on the case. The PC case is pure aesthetics — it doesn’t affect performance. A $50 case and a $200 case running the same components perform identically. Spend the case budget difference on a better GPU.
Mistake 2: Buying a 4K monitor for a budget PC. A 4K monitor connected to a GPU that can’t run 4K is a 1080p monitor you overpaid for. Match your monitor to your hardware.
Mistake 3: Skipping the headset. Gaming without good audio is playing with one sense removed. The $50 HyperX Cloud Stinger 2 will transform your Minecraft experience more than a $100 GPU upgrade.
Mistake 4: Ignoring the chair. Back pain from bad posture doesn’t announce itself immediately. By the time most gamers notice they have a problem, they’ve had poor posture for months. A good chair is health infrastructure, not a luxury.
Mistake 5: Prioritizing RGB over everything else. RGB lighting does nothing for gaming performance. It’s the last thing you should buy, not the first.
Mistake 6: Buying a fixed desk when a Flexispot is affordable. The price difference between a quality fixed desk and a Flexispot E2 electric standing desk is $100–$150. That difference buys you the ability to adjust your desk to any height instantly, switch between sitting and standing, and protect your posture for the entire time you own the desk. It’s one of the best value upgrades available in a gaming setup.
Frequently Asked Questions
How much does a complete beginner gaming setup cost in 2026?
A genuinely complete gaming setup — PC, monitor, mouse, keyboard, headset, desk, and chair — realistically costs $900–$1,500 at the Starter Tier. Budget expectations have shifted in 2026, with entry-level gaming systems starting around $500, mid-range options at $800–$1,000, and high-end builds exceeding $4,000. 9meters The peripherals (monitor, mouse, keyboard, headset) add $300–$600 on top of the PC cost, and furniture (desk and chair) adds another $200–$500.
Should I build my own PC or buy pre-built?
For absolute beginners, a pre-built PC removes the research burden and provides a single warranty for the whole system — worth paying a small premium for the peace of mind. For anyone willing to spend 5–10 hours researching components and following a build guide, building your own PC saves 15–25% and teaches you how your system works. Both are valid choices in 2026.
Is Minecraft playable on a budget gaming PC?
Yes, easily. Minecraft is one of the least hardware-demanding popular games. A $500–$600 PC runs vanilla Minecraft at high settings without issue. Shader packs and heavy modpacks require more hardware — aim for 16GB RAM and an RTX 3060-class GPU if you plan to run Optifine shaders or large modpacks like All the Mods.
Do I need a gaming keyboard and mouse, or will regular ones work?
Regular keyboards and mice work for casual gaming. Gaming-specific peripherals make a meaningful difference in competitive games where precision and response time matter. For Minecraft specifically, any mouse with a quality sensor and a comfortable keyboard will serve you well. The upgrade to Razer peripherals is most impactful if you play multiple games, stream, or create content.
Is a standing desk worth it for gaming?
Absolutely — and it’s more worth it the more time you spend at your setup. Ergonomics matter when sitting at a desk for hours on end. Empire Alternating between sitting and standing reduces fatigue, improves circulation, and maintains the focus and energy that long gaming sessions drain. Flexispot standing desks are specifically designed for sustained desk use — they’re an investment in your comfort and long-term health, not just a gaming accessory.
What’s the single best upgrade to make to a basic setup?
If you already have a working PC, the single most impactful upgrade is almost always the monitor — upgrading from 60Hz to 144Hz dramatically changes how every game feels. The second most impactful is the headset — good spatial audio changes your situational awareness in every online game. The third most impactful is the desk/chair combination, which determines how long you can comfortably use the setup.
Conclusion
Building a gaming setup doesn’t have to be overwhelming — and it definitely doesn’t have to empty your bank account.
Start with the components that matter most for your experience: a capable PC, a smooth 144Hz monitor, a quality mouse and keyboard, and a headset that lets you actually hear what’s happening in your games. Add the furniture and finishing touches as your budget allows.
The framework is simple: spend on performance components, save on aesthetics, and invest in ergonomics early rather than learning their importance from a backache.
Here’s your action plan:
- Choose your budget tier (Starter, Solid, or Upgrade)
- Start with the PC and monitor — everything else is peripheral
- Add mouse, keyboard, headset — your control interface and audio
- Invest in your desk — especially if you’re spending 4+ hours daily
- Add finishing touches — desk mat, lighting, cable management
And when you’re ready to take your Minecraft experience to the next level beyond just playing:
👉 Start your Minecraft server with Shockbyte → From $1.99/month — play with friends on your own server
👉 Or get started with GG Servers → From $3.00/month — more global locations
👉 Build your setup with Razer peripherals → Gaming mice, keyboards, headsets, and chairs for every budget
👉 Upgrade your workspace with Flexispot → Ergonomic standing desks built for long gaming and creator sessions
👉 Turn your Minecraft passion into income with Printify → Print-on-demand merchandise — no upfront cost
Game well. Game comfortably. And build your setup one smart purchase at a time.
📋 Affiliate Disclosure: This post contains affiliate links. If you click a link and make a purchase, we may earn a small commission at no extra cost to you. We only recommend products we’ve genuinely researched and believe provide real value. Thank you for supporting this blog!